
Hello there!
Today I would like to share how I made this

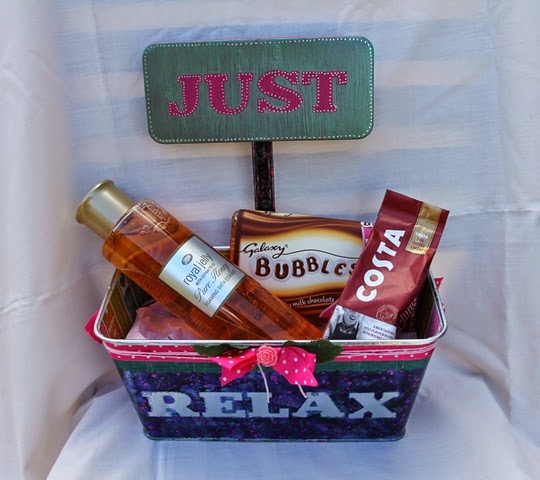
Recently I needed to create a box to house some gifts I had bought for someone. As always I couldn't find what I was looking for, until I found this tin

It was a perfect size for what I needed but of course it looked very plain!
So it just kinda begged me to alter it!
First of all I put a ruler along the base of the tin on one of the sides so I could use it as a guide for the {Hazel & Ruby Stencils}.

Next I took some {Kuretake Kurecolor Inks} and and added a few drops of different colours to an applicator, space the dots over the whole surface.

Gently stamp the applicator over the whole of the tin and the stencils (warning this will stain the stencils). When it is totally dry gently remove the stencils.


To cover the inside of the tin I used the {Hazel & Ruby's Fat Roll Washi Tape} and stuck it around the edges. It is really flexible so it was really easy to help mold it to the tin.

I then needed to make the plaque for the top of the tin. I took some {Artiste Acrylic Paint} and painted over the black plastic and once it was dry I sealed it with Modge Podge.

I then added some stencil wording and then painted over with some more paint.

Once the paint had dried I gently removed the stencils and then cotted around the edges with a {Zig Painty Silver Pen}.

The last thing I need to do was fill it with the goodies so it was ready to give to the receiver.
I can't tell you enough how much fun and how easy these stencils from Hazel & Ruby are to use. They just gently stick on to your projects and then can be removed and stuck back on the backing paper and then they are all ready to go again!

Thanks so much for stopping by! Have a lovely day
Beckie :)
No comments:
Post a Comment