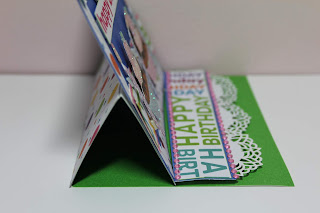
Hello, today I have a little tutorial on how to make a pop up card.
I wanted to create something a little unique for the receiver.
The beauty of this card design is that it can fold neatly in an envelope but with one small step it changes in to a pop up card.
So here is how you make this fun little card :
First of all you need to take a card blank of your choice. Fold it back on itself so that the colour is on the inside. Then take the top side and fold the outside edge in to the middle. You card should look like the picture below.
Next cut a piece of the balloon paper to fit on the top left hand side of the fold. Though the balloons are on their side in the picture you need to make sure that when the card stands up they are in the right direction. Leave this to one side.
Next to make the top of the card.
Cut another card blank in half, you will only need one side of it.
Cut a piece of balloon paper slightly smaller than the base. Turn it over and cut a window in the centre leaving a 1cm border all around. The easiest way to do this is mark at 1cm points around each side and join them up before cutting out the square in the centre.
Glue this to the card blank as shown below.
Cut a piece of pink glitter card 3cm x 10.5cm and glue a piece of numbers paper measuring 2.5cm x 10.5cm on top. Adhere this to the bottom section on the card and trim off any excess.
Cut a 'happy birthday' from the Birthday Wish paper and glue to the top. You can ink the edges by running one of the ink pads lightly down the side if desired.
Decorate along the number paper with birthday cakes and candles. The ones I used are from an older release from Ruby Rock-it. It's always good to have a rummage and see what can be found!!
Next we need to create the 'stopper' for the card which allows it to stand up, a bit like a little easel.
First take one of the mini doilies and cut it in half. Repeat this with another one.
Glue these to the back of a piece of card stock measuring 3cm x 10.5cm. These can be showing as much or little as you'd like. Once that is dry to the centre of the base card using foam pads.
Decorate with more birthday paper and some gems to give it a wee sparkle.
Next take you top piece and add glue on the side opposite the balloon paper, lay the decorated card on the top. This is a cleaner way of making sure that nothing goes on the back of the card where it shouldn't be!
When you have done that test out your pop up card!
Products Used
Fundamentals Basic Cardstock - there are SO many colours!
Crafter's Choice Bling - Pink 3mm
I hope you are inspired to give this a try!!
There are so many ways that this basic card can be adapted to suit any occasion.
May be try a circular version …. now they are fun!


No comments:
Post a Comment